So, recently I tidied and organised my would be dining room and decorated and displayed things to turn it into my new 'Geek Den'. This went down well the next time I was hosting my D&D group, as it saved us all huddling around the coffee table. However, as I'm sure you are all aware, there is always that itch to improve. So, with that in mind, I took to the internet to see how much one would cost to buy/build. The designs I found were all a bit more complex than what I was looking for and to buy one was completely out of the question. So, I sat and thought things out and, with a little help from my fellow geek Mike, I came up with the basic design for my table. Below is the step by step of how I built it and a cost up too.
Step 1
First off, get yourself 2 MDF boards. I got 3/4" thick, but to be honest I think 1/2" would do it too. I used 38"x62". Mark up on one of these where you are going to cut out. I wanted a 2'x4' gap in the middle, leaving a 7" border. I put dice trays and cup slots around the edge, but these are just extras and not needed really (unless you've got badass taste).
Step 2
Now for the scary part (unless you're actually good with tools). I drilled holes in order to get the jigsaw in and then cut out everywhere I marked up. There are better ways to cut circles than what I did, which was to do it by hand with the jigsaw. I cut the corners here too, to round them off (Screw the two boards together and cut the corners together to make sure they match up). Once they are all cut out, you can lay it on top of the bottom piece, just to get an idea of how it will look and get all excited like a little girl (like I did).
Step 3
This is the tidying up step. Now is the time to sand all the edges and sides to smooth them off and check, double check and then triple check that 2 2x2 boards will fit in the gap. Make sure everything is as you want it now, as next its all cosmetic!
Step 4
Now that it's all cut and ready, its time to seal it. Not 100% if you need to do this, but I felt better knowing it was done. Plus it works nicely as a primer for what comes next; the paint!
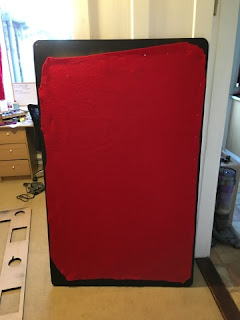
I used a Satin black car spray from Halfords, but really you can use whatever you want to paint it. Whatever you chose, you'll want to paint about 4" or 5" in from the edge on the bottom layer, and then all the edges and all the top layer. Then, once this is dry, staple some felt to the bottom layer. I went with red. We are nearly done.
Step 5
I used red mouse mats to cushion the dice trays. I stapled them to the bottom of the top layer, to keep them in position. Once all these are on, its a case of screwing both boards together. I used 1.25" screws, screwing from the bottom to keep the top border nice and clean. I used spare bits from the cut up mouse mats to pad the drinks slots and then printed and laminated some bits just to decorate them a bit more (I have different D&D phrases written in Gallifreyan)
And that, my friends, is it. You now have a pretty awesome gaming table. I just use an occasional table that folds away to place it on top of, but you can always attach legs of whatever and keep it up permanently.
Expenses
- Wood = £35
- Felt = £4.57
- Mouse mats = £11.94
- Spray paint = £7.99
- PVA sealant = £5.99
Total cost = £65.49
Mine cost me slightly more, but that's because I paid delivery for the wood, and had to buy some tools, or bits for tools. Even with those added on though, still well under £100
Enjoy guys!


No comments:
Post a Comment